 Cryo
Cryo
 Claymore
Sandrone
Mirrored Analysis
The Seventh of the Fatui Harbingers, "Marionette", is the reference on-field carry for Stellar-Conduct. Her Charged Attack brings out her automaton Fagio, whose condensed beams deal Stellar-Conduct DMG, and her short-cooldown Skill resets Fagio for the next salvo. With Cryo and Electro teammates around her, she is one of the strongest main DPS of version 7.1.

Stellar-Conduct DPS
Weapons


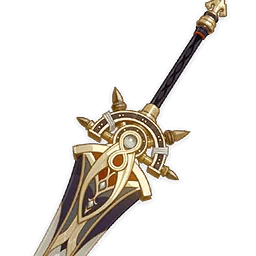



Artifacts

Set effects

Set effects

Set effects
Main stats
Substat priority
Stat targets
- ATK 2,000+ first: it maxes both her Stellar-Conduct Base DMG bonus (+14%) and her EM passive (+160)
- CRIT Rate 30–40% on the stat screen (Disenchantment in Deep Shadow adds 16% in combat)
- CRIT DMG 180%+
- Energy Recharge ~120–140%: with 3 Cryo or 2 Cryo + 2 Electro teammates, just Burst when available; never build beyond ~140% at the expense of ATK/CRIT
Talent priority
Use an ATK% goblet: Cryo DMG Bonus does not apply to direct Stellar-Conduct DMG, which scales with ATK, EM and reaction bonuses and can CRIT. One of her teammates should hold Heart of the Furnace for its +50% Stellar Glimmer DMG team buff.
Recommended teams
Premium Stellar-Conduct




Her best team: Yae Miko provides Electro, off-field damage and huge Stellar-Conduct buffs at C1, Odette buffs Stellar Glimmer DMG, and Escoffier heals and shreds Cryo RES.
Stellar-Conduct with Alyosha

With C6 Alyosha, matches the Escoffier version: his ATK, Stellar-Conduct DMG and EM buffs all go to Sandrone, and his hound heals her.



How to play
How she works
- Stellar Jubilee: Light of Rationalisme turns every Superconduct in the party into Stellar-Conduct (and Cryo Swirl into Stellar Swirl), and raises their Base DMG by 0.7% per 100 ATK, up to +14% at 2,000 ATK. Stellar-Conduct deals no damage by itself: it creates a Polestar Field, and characters inside it enter Radiance: Stellar-Conduct.
- Charged Attack: Sandrone summons Fagio in Decoding mode. Fagio sweeps enemies with Cryo fire and periodically fires condensed beams, which count as Stellar-Conduct DMG while she is in Radiance. Decoding Power builds up as Fagio fires; at 100 points, Fagio falls into Power Overdrive and only deals weak Cryo hits until it cools down below 50.
- Formule Phenomenale: Differential Analysis (Skill, 4s CD) puts her on her hovercraft, fires two Prism Shots and almost instantly clears Fagio's Decoding Power. With more than 50 Decoding Power, the second shot deals 400% DMG, and every 10 points cleared give a stack of Refined Tactics (max 10).
- Formule Phenomenale: Q.E.D. (Burst, 60 Energy) fires a Convective Inhibition Ray that consumes Refined Tactics for up to +100% DMG.
- A Lady's Code of Conduct converts ATK into Elemental Mastery (8 EM per 100 ATK, up to 160 at 2,000 ATK).
Rotation
- Set up your supports: Odette's Skill, Yae Miko's Skill, then Escoffier or Alyosha.
- Swap to Sandrone: Charged Attack until Fagio's Decoding Power is full, then E to clear it. Repeat three times (twice at C1, since Fagio fires for longer).
- Fire Q right after a Skill, when Refined Tactics is at 10 stacks. The Burst can cancel the end of the Skill animation.
Her Skill cooldown matches the length of a full Charged Attack, so the whole loop is simply "hold Charged Attack, press E". Cancelling the Skill with a Normal Attack is possible but only a small gain.
Strengths
- Top-tier damage at C0, among the best carries of version 7.1
- Very simple loop: Charged Attack, Skill, repeat
- Flexible rotations, with a Burst that fits anywhere after a Skill
- Cheap to gear: ATK/ATK/CRIT and good 4-star weapons
Weaknesses
- Needs Electro application to create Polestar Fields; her best teammates (Yae Miko, Odette) are limited 5-stars
- Cryo DMG Bonus does nothing for her Stellar-Conduct damage, which can confuse new players
- Decoding Power management punishes spamming Charged Attacks without her Skill
Notable dupes · Constellation
Fagio fires for longer and the whole party deals +30% Stellar Glimmer DMG. Good, but a premium teammate is worth more.
+40% CRIT DMG on condensed beams, plus up to +60% more as they keep firing: her best early constellation, ideally after her signature.
Extra Prismatic Resonance Cannon hits every 4s whenever she deals Stellar-Conduct DMG.
The third beam becomes a continuous Cluster Beam, and all her Stellar Glimmer DMG is elevated by 20%: a massive jump for whales.
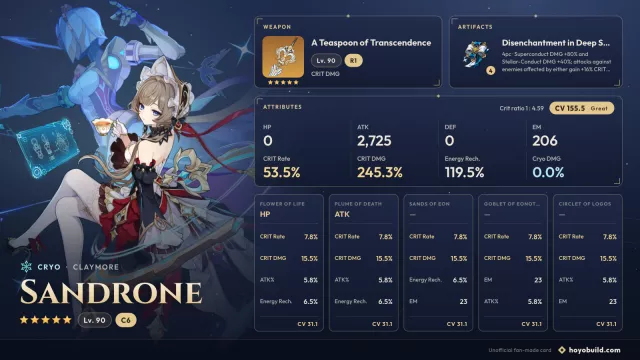
Player builds for Sandrone

Sources & references
- https://www.prydwen.gg/genshin-impact/characters/sandrone
- https://www.prydwen.gg/genshin-impact/tier-list
- https://game8.co/games/Genshin-Impact/archives/382107
- https://game8.co/games/Genshin-Impact/archives/297465
- https://keqingmains.com/q/sandrone-quickguide/
- https://gi.yatta.moe/api/v2/en/avatar/10000133
- https://gi.yatta.moe/api/v2/fr/avatar/10000133